The HomePod runs a customised version of iOS on its A8 processor. Fortunately, it will (by default) keep itself up-to-date automatically, so you don’t have to fiddle with the limited controls to update the software.
But if a new HomePod software version drops and you want to force an update as soon as possible, or if you’ve turned off automatic updates and need to do it manually, it’s not to difficult. Here’s what you do.
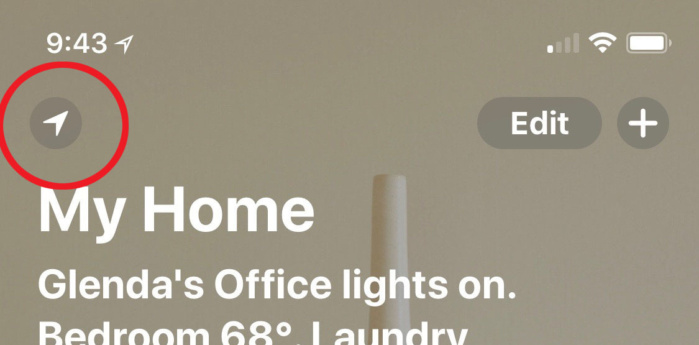
1. Open the Homeapp and tap on the location arrow in the upper left. If you have multiple “Homes,” be sure to tap it when at the Home that contains the HomePod you wish to update. But most of us only have one Home.
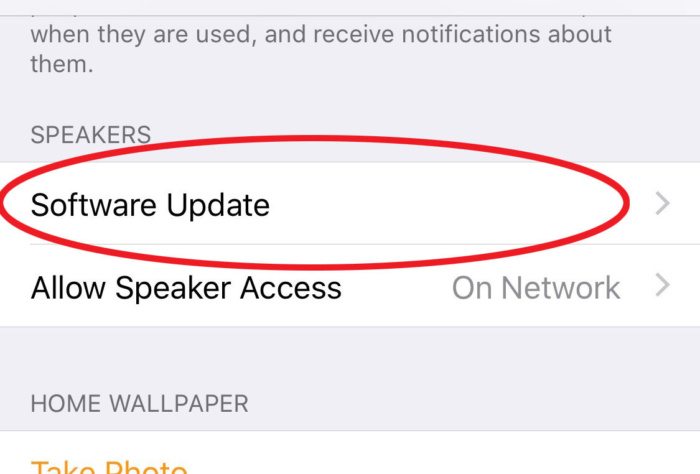
2. Scroll down to the Speakerssection and tap on Software Update.
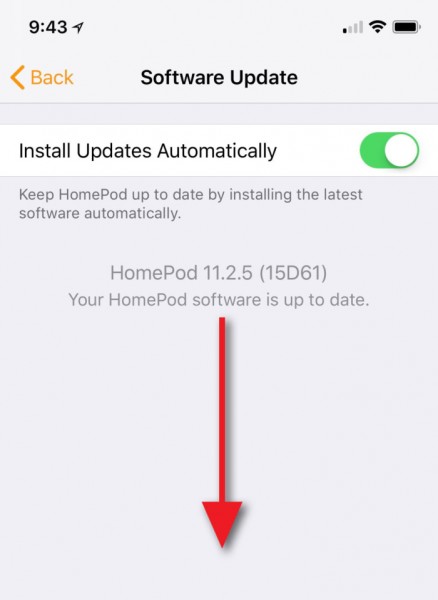
 3. You’ll see a toggle to Install Updates Automatically, which is enabled by default. This screen also lists the version number of the software running on your HomePod. Drag the screen downward to force a software refresh and install a new version, if one is available.
It can take some time for a new version to show up for everyone, so don’t freak out if you hear that new software is available and your HomePod won’t update to it right away. Wait a few hours and try again.
Related Articles